
This is really the time of the shaker card. I told myself two weeks ago that I was going to try to make one and here it is. Well, technically this is the second one, but it looks better than the first one. :wink wink:
I bought this Stampendous Raven CRR152 background stamp with my sister and I in mind. Every year we watch the Simpsons Treehouse of Horror episodes and we always remember the episode where they did a rendition of Edgar Allen Poe’s The Raven. So I had no choice, but to make a shaker card out of it.
My card base is an A6 note card in Papaya from Papersource.com. I stamped the raven image on some 90lb white cardstock. Once dry I went over the image with my Ranger mini-ink blending tool and the Tim Holtz Distress ink in Spiced Marmalade. I can be honest and say that I got very excited once that part was done. IMO it looked amazing! I could see why people love using the Distress Inks.
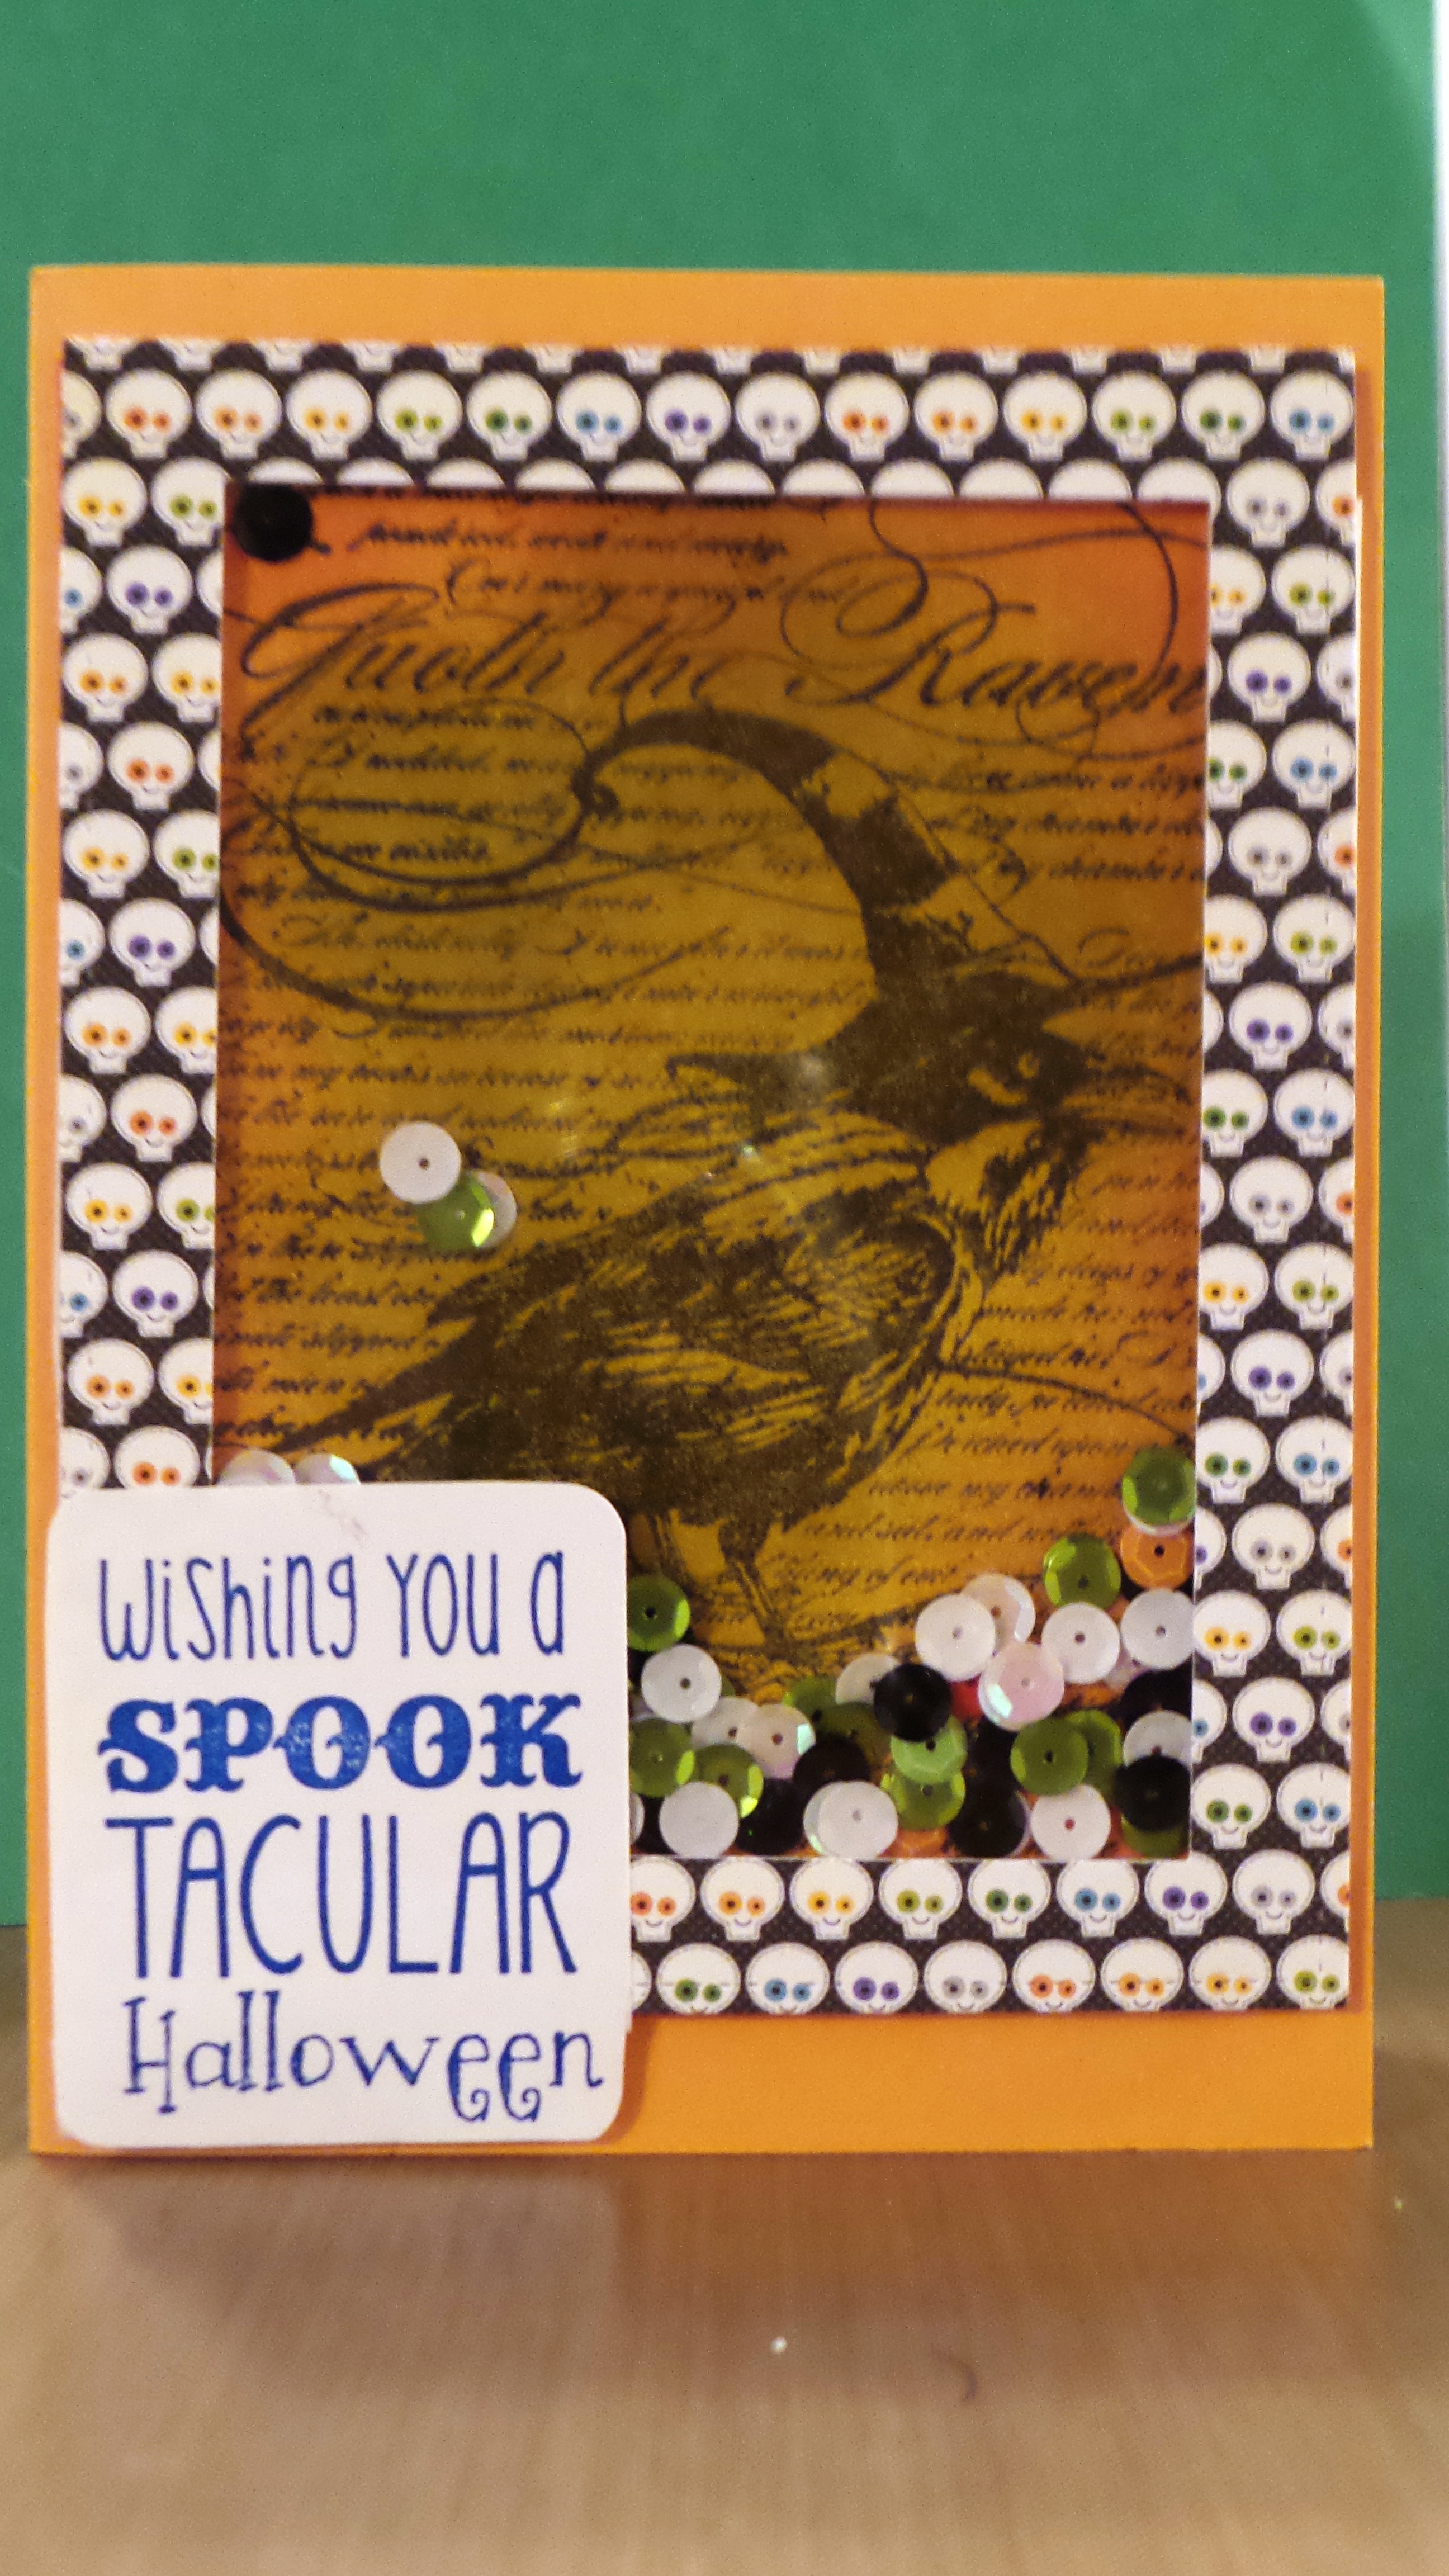 After attaching the raven image to the card base I started on the front of the shaker card. I used a skull paper from the Doodlebug designs October 31 paper pad collection and a Lawn Fawn stitched rectangle die to create the top part of my card. I glued a piece of 3m Transparency Film to the cut out and added some Elmer’s craft mounting tape to the back. And here comes the fun part. Adding sequins! I grabbed a nice sized amount of sequins (orange, green, iridescent white, white and black), dropped then in the middle of the raven image and oh so carefully attached the front panel to the card base.
SUCCESS! :The crowd roars:
I stamped my sentiment on a scrap piece of cardstock with a Ranger Dye ink pad in Blue Ribbon, rounded the corners, and slapped it on the bottom right corner.
I am so happy with this first go round with this Shaker card technique. I can’t wait to try different designs and hopefully in the future become a Shaker card Master. 🙂
-Kelly


